Valentine Multiples Made Easy
When my kids were little over 30 years ago we would get that class list and create some very basic valentine cards and attach the simple sticker or tootsie roll.
Then my granddaughter would spend Fridays crafting with Grannie. We would work for several Fridays completing special gifts for each class mate, office staff, and any teachers that had a special place in her heart.
I love to create in multiples. These days I'm just creating cards. But still I create a bunch. So anytime I can simplify the process it makes it more fun. And if you follow me in other places it saves me 'spoons'.
Today's process is stamping in multiples.
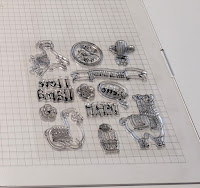
I take the whole stamp set, mount it with tape or double sided sticky to the clear plate of my MISTI stamping tool.
If the stamps are too close together to create a border around them I move them around slightly.
 |
| Mount Stamp Set to MISTI |
Stamp entire set on white cardstock.
 |
| Stamp on white cardstock |
Place stamped sheet on your Silhouette PixScan Mat.
 |
| Place on PixScan Mat |
I use my Cannon camera to take a picture, you can use your cell phone, a scanner, this is just what works for me.
 |
| Take a picture of your PixScan Mat |
Now I remove the media card and insert in my laptop. And pull the image into my PixScan Silhouette software.
 |
| 2 sets 'die cuts' ready to stamp |
 |
| Insert 'die cuts' |
Now you can Stamp all the images at the same time.
 |
| Stamp 'die cuts' |
 |
| Ready for assembly |
Subscribe and follow to see to more tweaks and to see this finished project.
No comments:
Post a Comment