Multiples Made Easy

Recently I added a single tool to the Tweak Room that I am not sure how I ever lived without. do the tweak here.
With that installed here's how making multiples gets stupid simple, yes I just said stupid simple.
Frequently when planning events the need to create lots of similar items presents itself.
As the saying goes failing to plan you are planning to fail...
 Todays project is wedding banners.
First let's create the pennants. Already know how to create pennants scroll all the way to the bottom for the time saving tweak.
Paper is 8.5X11
Choose your rectangle shape. Draw a rectangle 4.6 X 5.2 (see pics below) Rectangle
Click on your side ruler and drag a guide line to center of work area. Then click on top ruler and drag guideline to bottom of shape. Guidelines
Now drag your rectangle so it is centered to vertical guideline and horizontal one is at bottom of shape.
Double click on your shape to open edit points mode. Edit points
Click on left node and move to center guideline. Click right node and select delete. Now you have created a triangle. Delete
 |
| Create a Rectangle. |
 |
| Create guidelines from rulers. If your rulers are not displayed on your screen open grid settings window and toggle ruler at bottom of screen. |
 |
| Edit points mode and selecting single node. |
 |
| Drag node to center line. |
 |
| Delete right side node to complete triangle. |
 Add holes to either side to thread your ribbon or jute. I use the rhinestone tool in design edition with single click add, however you can use your circle tool.
Select ellipse tool hold shift button while dragging mouse to create even .200 circle.
Now right click and duplicate. Drag them approximately where you want them on your pennant.
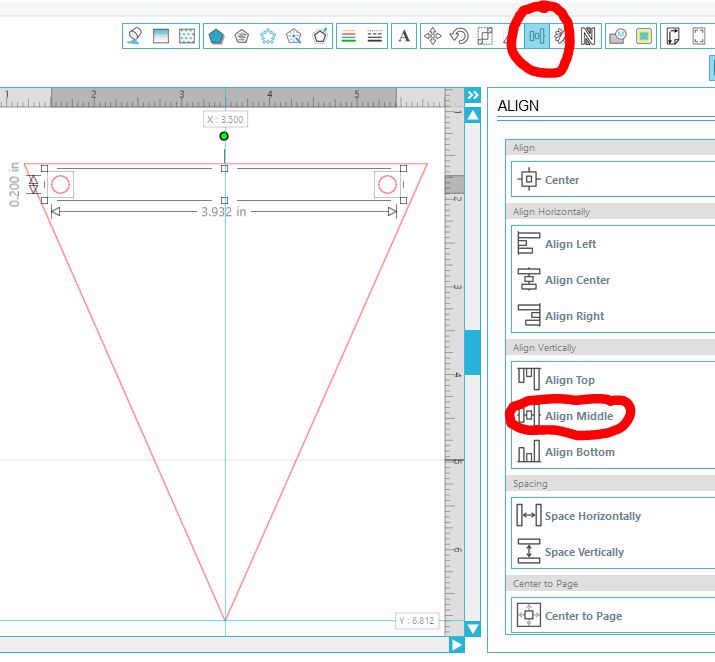
Then open your align window and select both holes by using your shift key and clicking each one. Select align middle.
Then group.
With your holes grouped hold shift key and select your triangle also. Now click align center and your holes are now evenly centered to you triangle. Right click within shape and create compound path. (otherwise your sketch line will not respond properly in the next step.)
Basic pennant design completed.
Now lets add a sketch pen dotted line.
I add this for design and guide placement remember we said failing to plan...
Open your offset window. Select internal offset. Select rounded corners. I used distance 0.100 because I wanted the dotted line inside of my holes. Click apply.

With offset line still selected open line style window. Select dotted line. Then open line color window and make your dotted line blue. (more planning here) Your first with sketch line is complete.


With offset line still selected open line style window. Select dotted line. Then open line color window and make your dotted line blue. (more planning here) Your first with sketch line is complete.

Lets make a few more.
Select both shapes, right click and group.
Open replicate window. Click mirror below. Drag mirrored shape beside original. Select both of those shapes and select duplicate below.

Sketching and Cutting your pennant
Again planning here... Open your cut settings window. Toggle advanced. Select cut order by line color. Double check your order. You want your blue cut first and then your red. If blue is not first click and drag to top of order.
Then with your blue selected choose material type as Silhouette Sketch Pen. Then right click in blue area and add a pause.
Now select your red line and add material type as cardstock. Double check all your settings.

Install Sketch Pen. Load paper in Silhouette. Click send to Silhouette. When your silhouette has finished sketching your dotted lines it will pause and you can replace pen with your cutting blade and click resume cutting.
Now you have completed four pennants.
While it seems lengthy the first time, trust me you'll soon be doing these simple steps on all your designs.
Now Stupid Simple Time Saving Tweak
Measure your dotted line. Place tape on work surface for quick reference.
 Stretch your accessories to length and cut as many as you need for your pennants. For these banners I needed 5 each pearls and lace. However I was making four sets so 20 total of each.
Remember those sketch lines... run hot glue across top line place lace. Add a few dots of hot glue across stitch line of applied lace to add pearl string.
Let's recap! Adding sketch lines makes for easy placement. Cutting all accessory pieces quickly makes assembly Stupid Quick and Simple.
Happy Tweaking...
No comments:
Post a Comment